Entra ID OAuth2
Based on your application type, refer to the appropriate section for Entra ID OAuth2 configuration:
Once the Entra ID OAuth2 configuration is ready, you can add users and groups to erwin Mart Portal.
Before you configure Entra ID OAuth2, ensure that you have responded to the questionnaire from your Quest Support representative so that they can provide the Redirect URI for your instance. If you did not receive the questionnaire, reach out to your Quest Support representative.
To configure Entra ID OAuth2 for erwin Mart Portal on-cloud authentication, follow these steps:
-
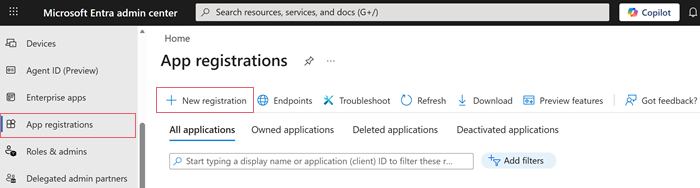
Log in to the Microsoft Entra admin center and go to the App registrations page.
-
Click New registration. On the Register an application page, enter an appropriate name, supported account type, and the Redirect URI provided by Quest Support.
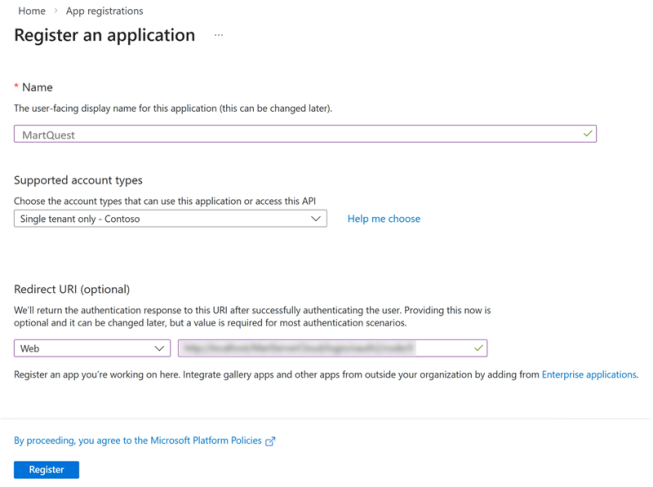
The Contoso support account type is used for registration.
Adding the Redirect URI is optional at this stage and can be updated later.
-
Click Register.
-
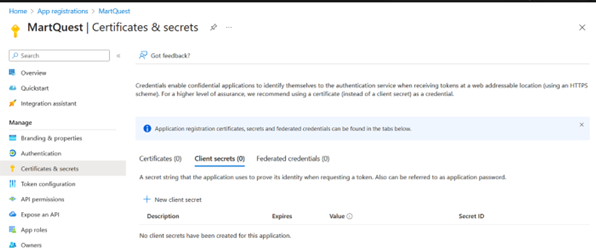
Go to Certificates & secrets.
-
Click New client secret.

-
Enter a Description. Then, click Add.
-
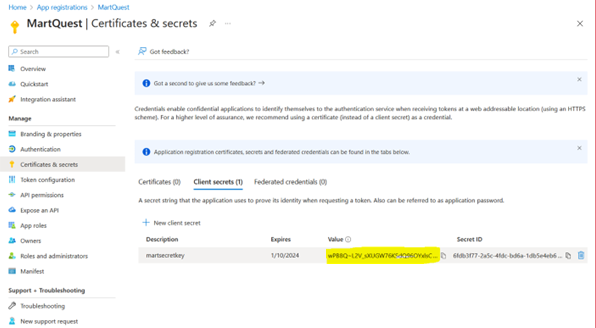
Copy the auto-generated value highlighted in the following image.
-
Go to API permissions.
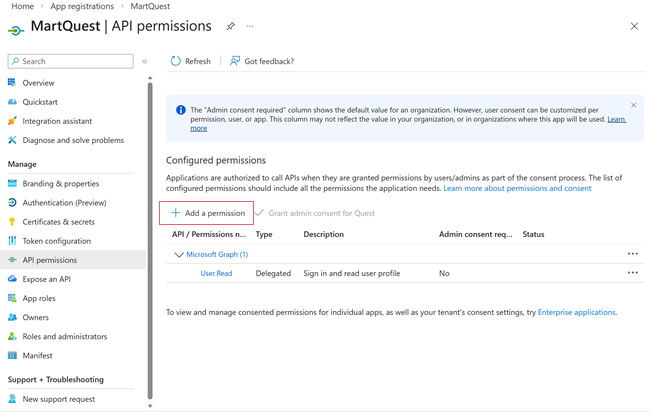
-
Click Add a permission.
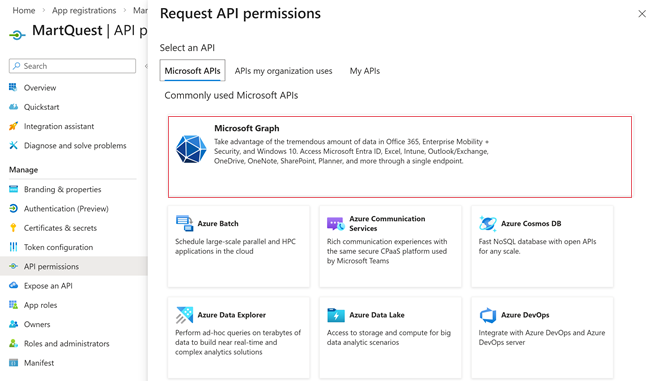
-
Click Microsoft Graph.
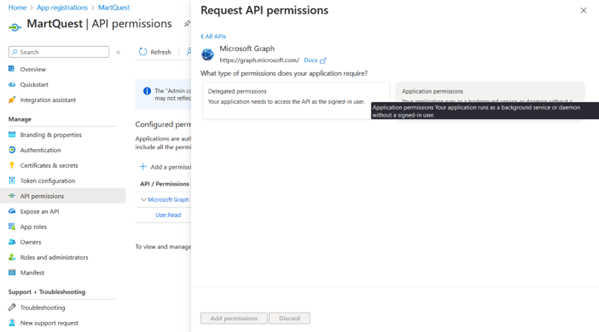
-
Select Application permissions.
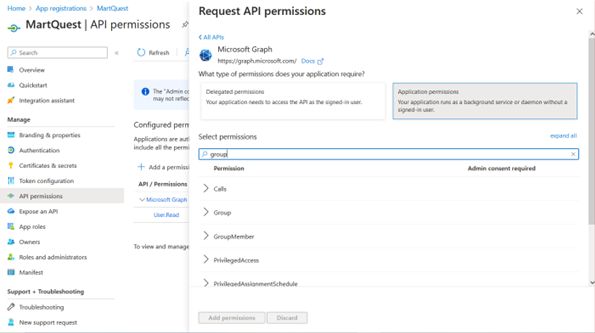
-
Search and expand Group and select Group.Read.All permission. Then, click Add permissions.
-
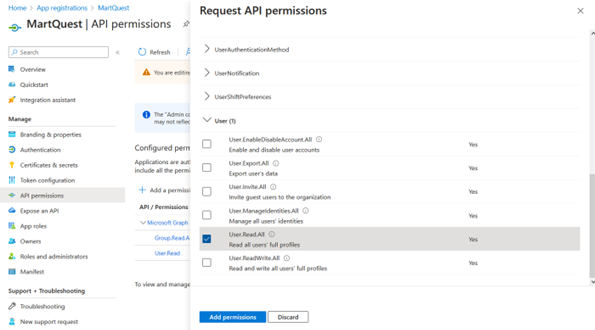
Go to Add a permission> Microsoft Graph > Application permissions again. Search and expand User and select User.Read.All permission. Then, click Add permissions.
-
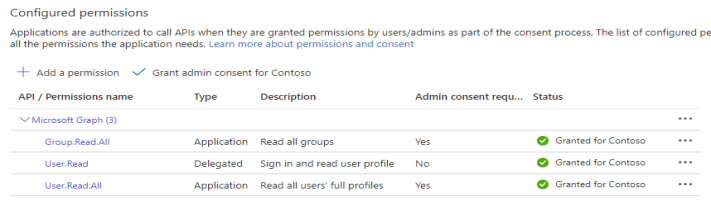
On the API permissions page, under the Configured permissions section, click Grant admin consent for Contoso.
-
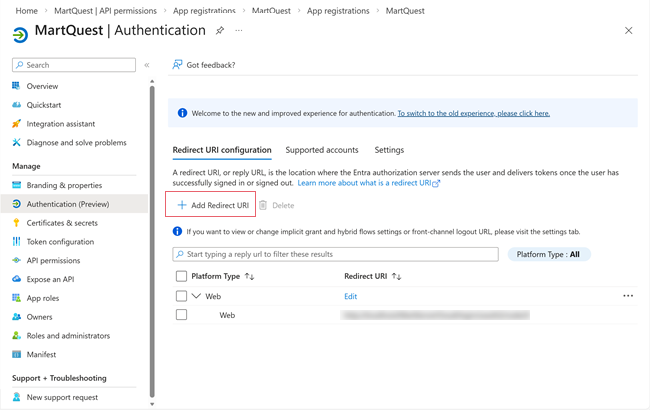
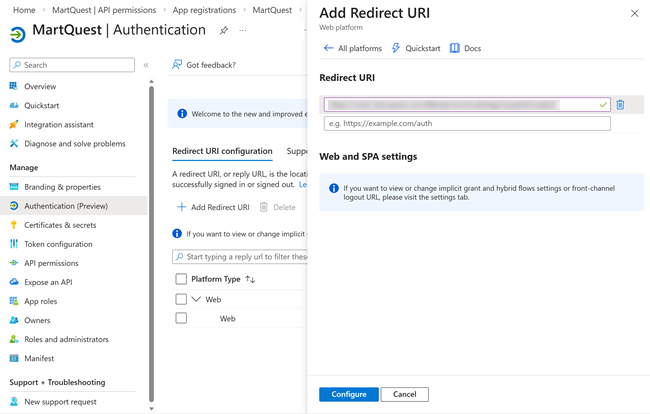
Go to the Authentication page and click Add Redirect URI.
-
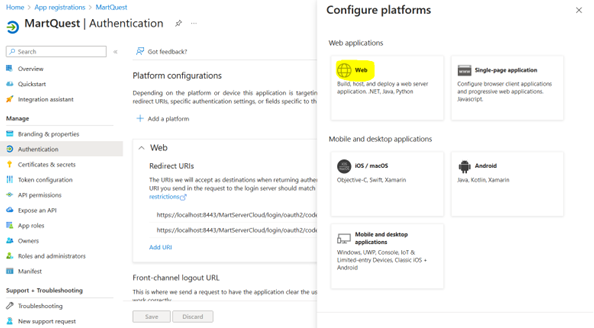
Click Web.
-
Enter the Redirect URI, and then click Configure.
-
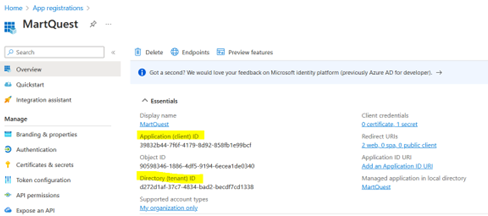
Go to the Overview page and note the Application (client) ID and Directory (tenant) ID. Graph scope and Client URI are default.
-
Share the following details with the Mart Cloud Support team:
-
Tenant ID: The Directory (tenant) ID copied in step 18.
-
Graph Scope: The Microsoft Graph permission scope requested for acquiring an access token. For example, https://graph.microsoft.com/.default.
-
Client ID: The Application (client) ID copied in step 18.
-
Client URI: The base URI. For example, https://login.microsoftonline.com/
-
Client Secret: The auto-generated value copied in step 7.
-
Once the support team authenticates erwin Mart Portal for you, you can move to users and groups in erwin Mart Portal at https://<your_instance>.myerwin.com/MartPortal.
To configure Entra ID OAuth2 for erwin Mart Portal on-premises authentication, follow these steps:
-
Log in to the Microsoft Entra admin center and and go to the App registrations page.
-
Click New registration. On the Register an application page, enter an appropriate name, supported account type, and the Redirect URI provided by Quest Support.
The Contoso support account type is used for registration.
Adding the Redirect URI is optional at this stage and can be updated later.
-
Click Register.
-
Go to Certificates & secrets.
-
Click New client secret.
-
Enter a Description. Then, click Add.
-
Copy the auto-generated value highlighted in the following image.
-
Go to API permissions.
-
Click Add a permission.
-
Click Microsoft Graph.
-
Select Application permissions.
-
Search and expand Group and select Group.Read.All permission. Then, click Add permissions.
-
Go to Add a permission> Microsoft Graph > Application permissions again. Search and expand User and select User.Read.All permission. Then, click Add permissions.
-
On the API permissions page, under the Configured permissions section, click Grant admin consent for Contoso.
-
Go to the Authentication page and click Add Redirect URI.
-
Click Web.
-
Enter the Redirect URI, and then click Configure.
-
Go to the Overview page and note the Application (client) ID and Directory (tenant) ID. Graph scope and Client URI are default.
-
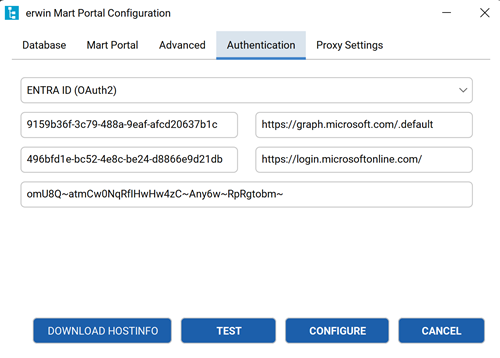
For Mart Portal on-premises, on the erwin Mart Portal Configuration screen, click the Authentication tab, select Entra ID OAuth2, and configure the following parameters for SSO:
-
Tenant ID: Paste the Directory (tenant) ID copied in step 18.
-
Graph Scope: Enter the Microsoft Graph permission scope requested for acquiring an access token. For example, https://graph.microsoft.com/.default.
-
Client ID: Paste the Application (client) ID copied in step 18.
-
Client URI: Enter the base URI. For example, https://login.microsoftonline.com/
-
Client Secret: Paste the auto-generated value copied in step 7.
-
-
Click Configure.
Your erwin Mart Portal is now authenticated via Entra ID OAuth2.
Adding Users in erwin Mart Portal
To add your Entra ID users to erwin Mart Portal, follow these steps:
-
Log in to the erwin Mart Portal as an administrator.
-
Go to Application Menu > Users.
The Users page appears.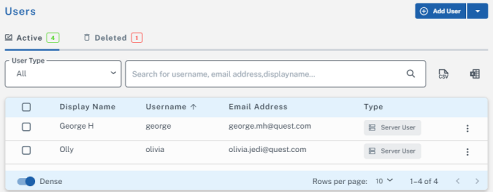
-
Click Add User.
The Add User page opens.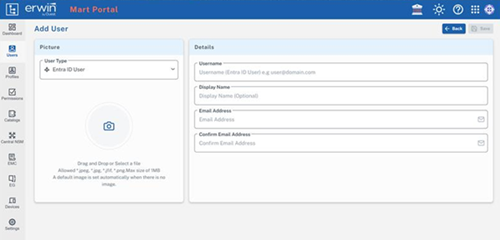
-
In the User Type field, select Entra ID User and add details in the Username, Display Name, Email Address, and Confirm Email Address fields.
-
Click Save.
The user has been added.
Adding Groups in erwin Mart Portal
To add your Entra ID groups to erwin Mart Portal, follow these steps:
-
In the Microsoft Entra admin center, click Groups > All groups > Download groups.
-
Log in to the erwin Mart Portal as an administrator.
-
Go to Application Menu > Users.
The Users page opens.
-
Click Add User.
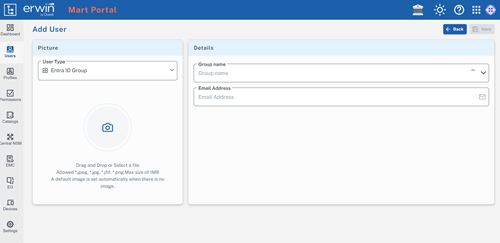
The Add User page appears. -
Under User Type, select Entra ID Group.
-
Under Group name, select the group that you want to add.
-
In the Email Address field, enter your email address.
-
Click Save.
The group has been added.